
Connect Meta
Connect Meta with your Facebook login or add your Pixel ID and Conversions API access token manually, then allowlist your domain so conversions reach Meta.
Connecting Meta is what lets Zappush deliver your conversions server-side. Connect with your Facebook login, or add your Pixel ID and Conversions API access token manually. Then, if you advertise a restricted category, allowlist your compliant domain.
1. Open Meta in the dashboard
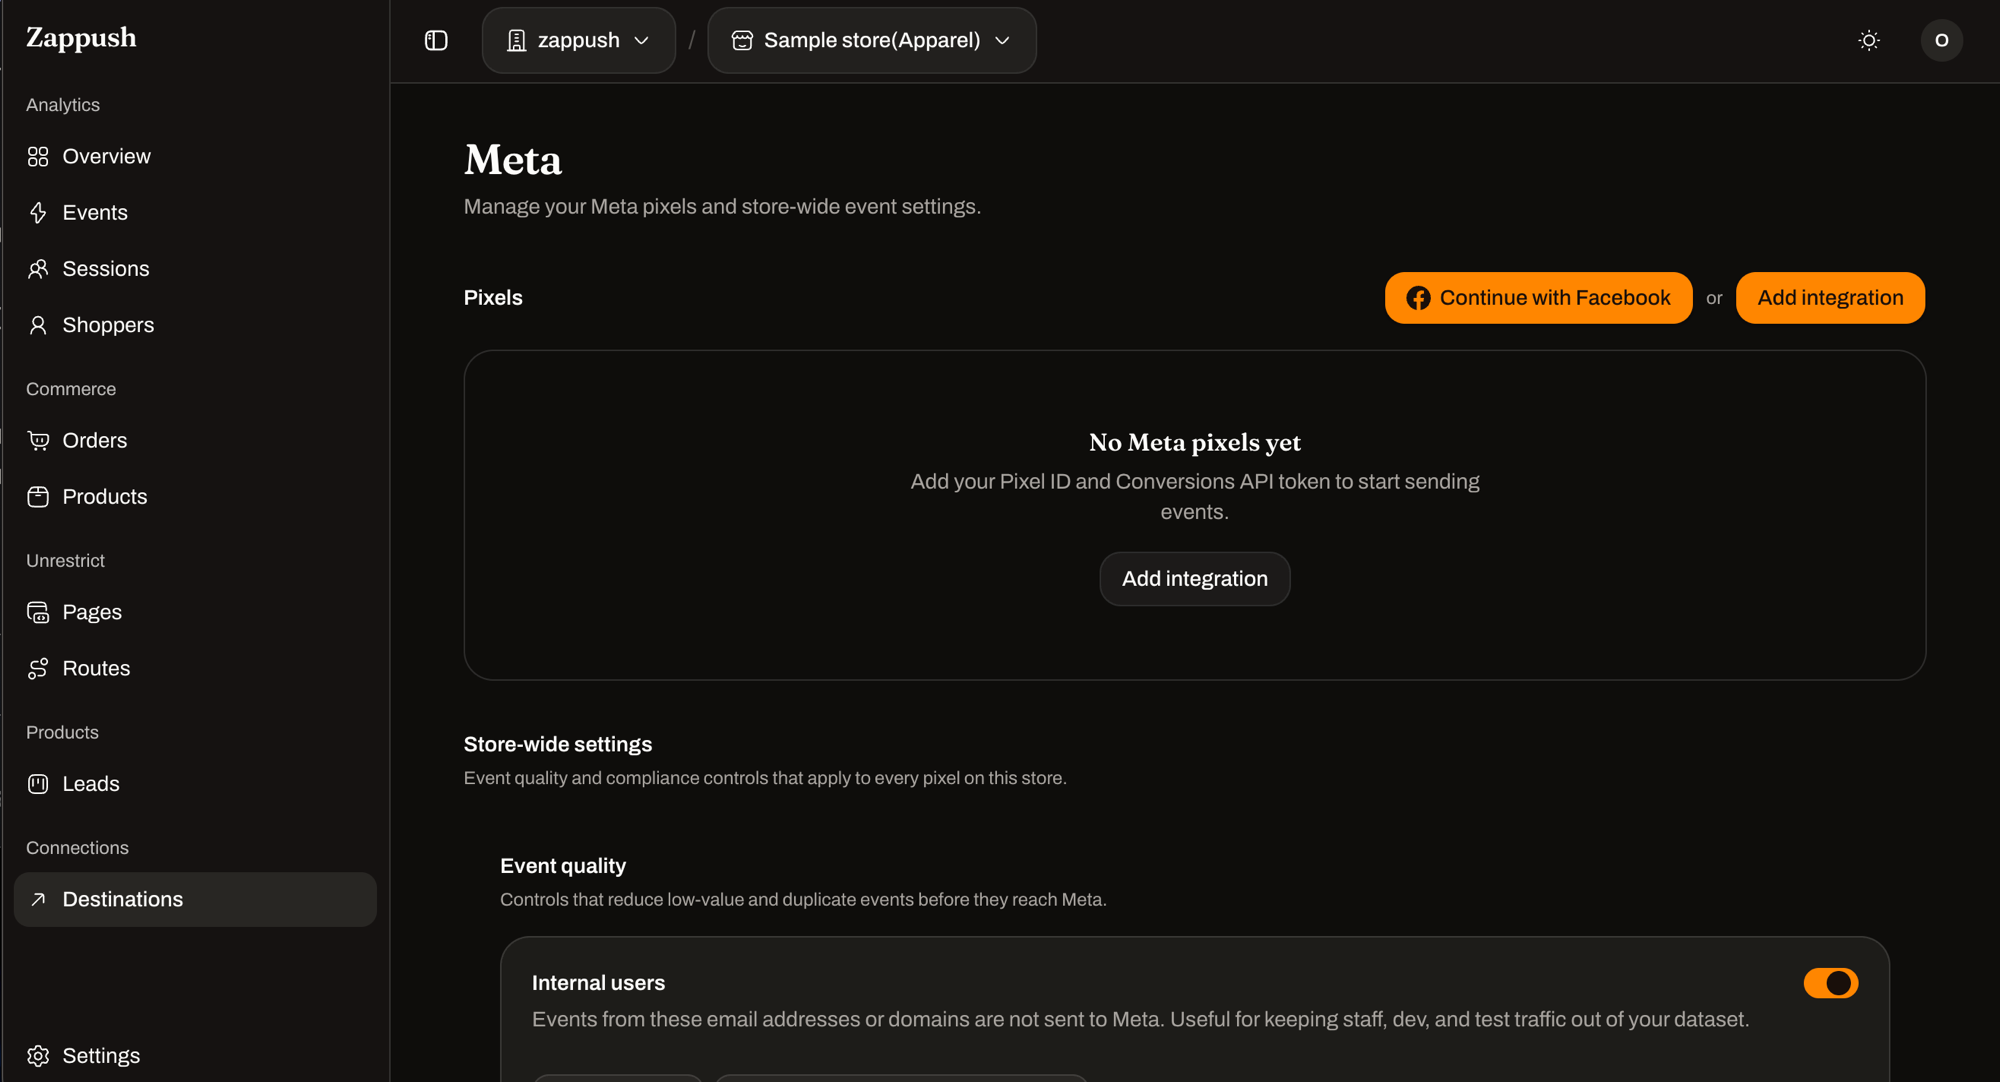
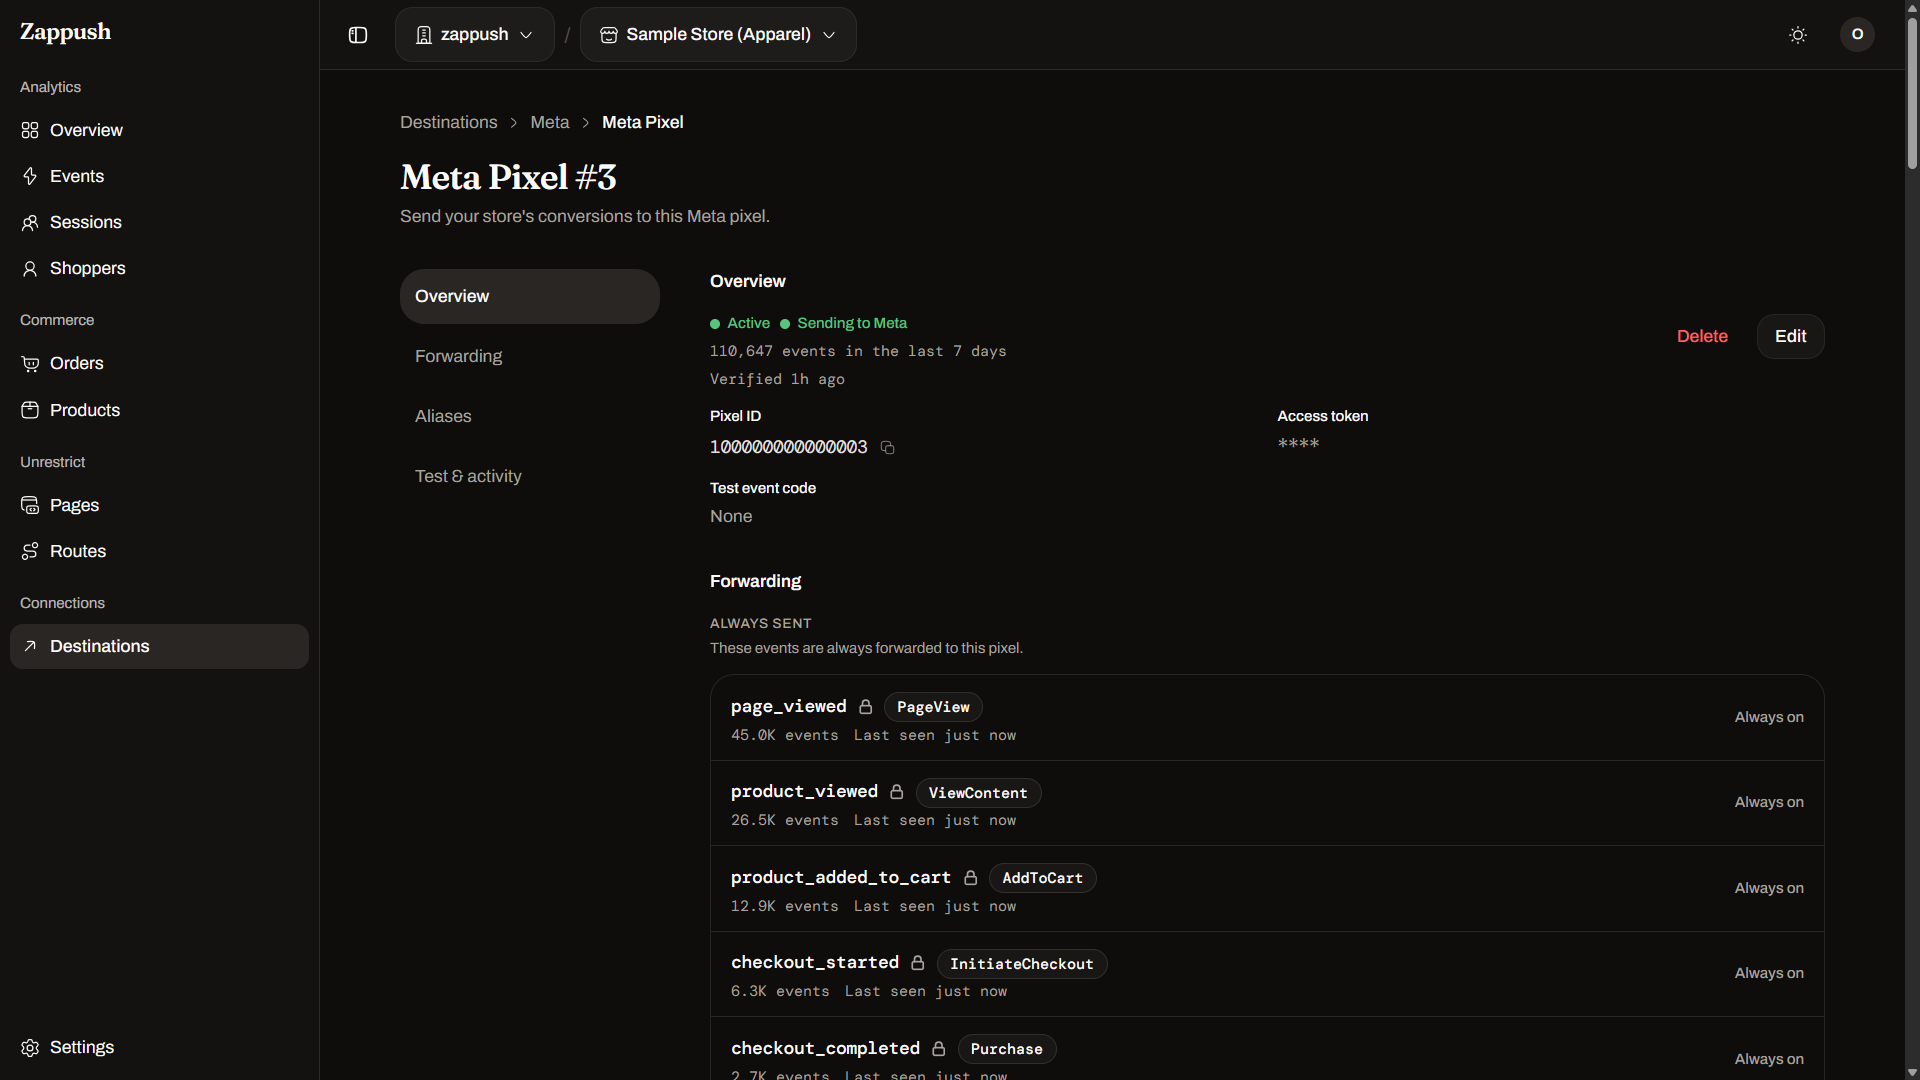
In the sidebar, open Connections → Destinations → Meta. This is where every Meta pixel on your store lives.
2. Connect with Facebook
Click Continue with Facebook and sign in to Meta. Zappush finds your pixel, connects it, and sends a test event automatically. If your account has more than one pixel, pick the one to connect. A confirmation appears once the pixel is connected and it shows up in your list, with no tokens to copy. You can skip straight to allowlisting your domain.
The automatic connect couldn't finish? Click Add integration and follow the steps below.
3. Add your Pixel ID
Your Pixel ID (Meta also calls it a Dataset ID) is the 10 to 20 digit number that identifies your pixel.
- Find it in Meta Events Manager → Data Sources → your pixel → Settings.
- Paste it into the Pixel ID / Dataset ID field.
4. Add your Conversions API access token
This token lets Zappush send conversions to your pixel from our servers. It starts
with EAA.
To generate it in Meta:
- Open Events Manager.
- Select the dataset that matches the Pixel ID you entered above.
- Click Settings.
- Scroll to Conversions API and choose Set up with Dataset Quality API (Recommended).
- Click Generate Access Token.
- Under the dataset dropdown, pick the same dataset again.
- Generate the token and copy it.
Paste it into the Conversions API Access Token field. If you copied a label like
Access Token: along with it, remove that prefix.
Need a visual walkthrough? Watch how to get a Meta Conversions API access token on YouTube, or read Meta's official guide: Get started with the Conversions API
Test event code is optional. Find it in Events Manager → Test Events. Add it if you want to watch your first events arrive in Meta's Test Events tab before they count as live. You can leave it blank for normal production use.
5. Save and test the connection
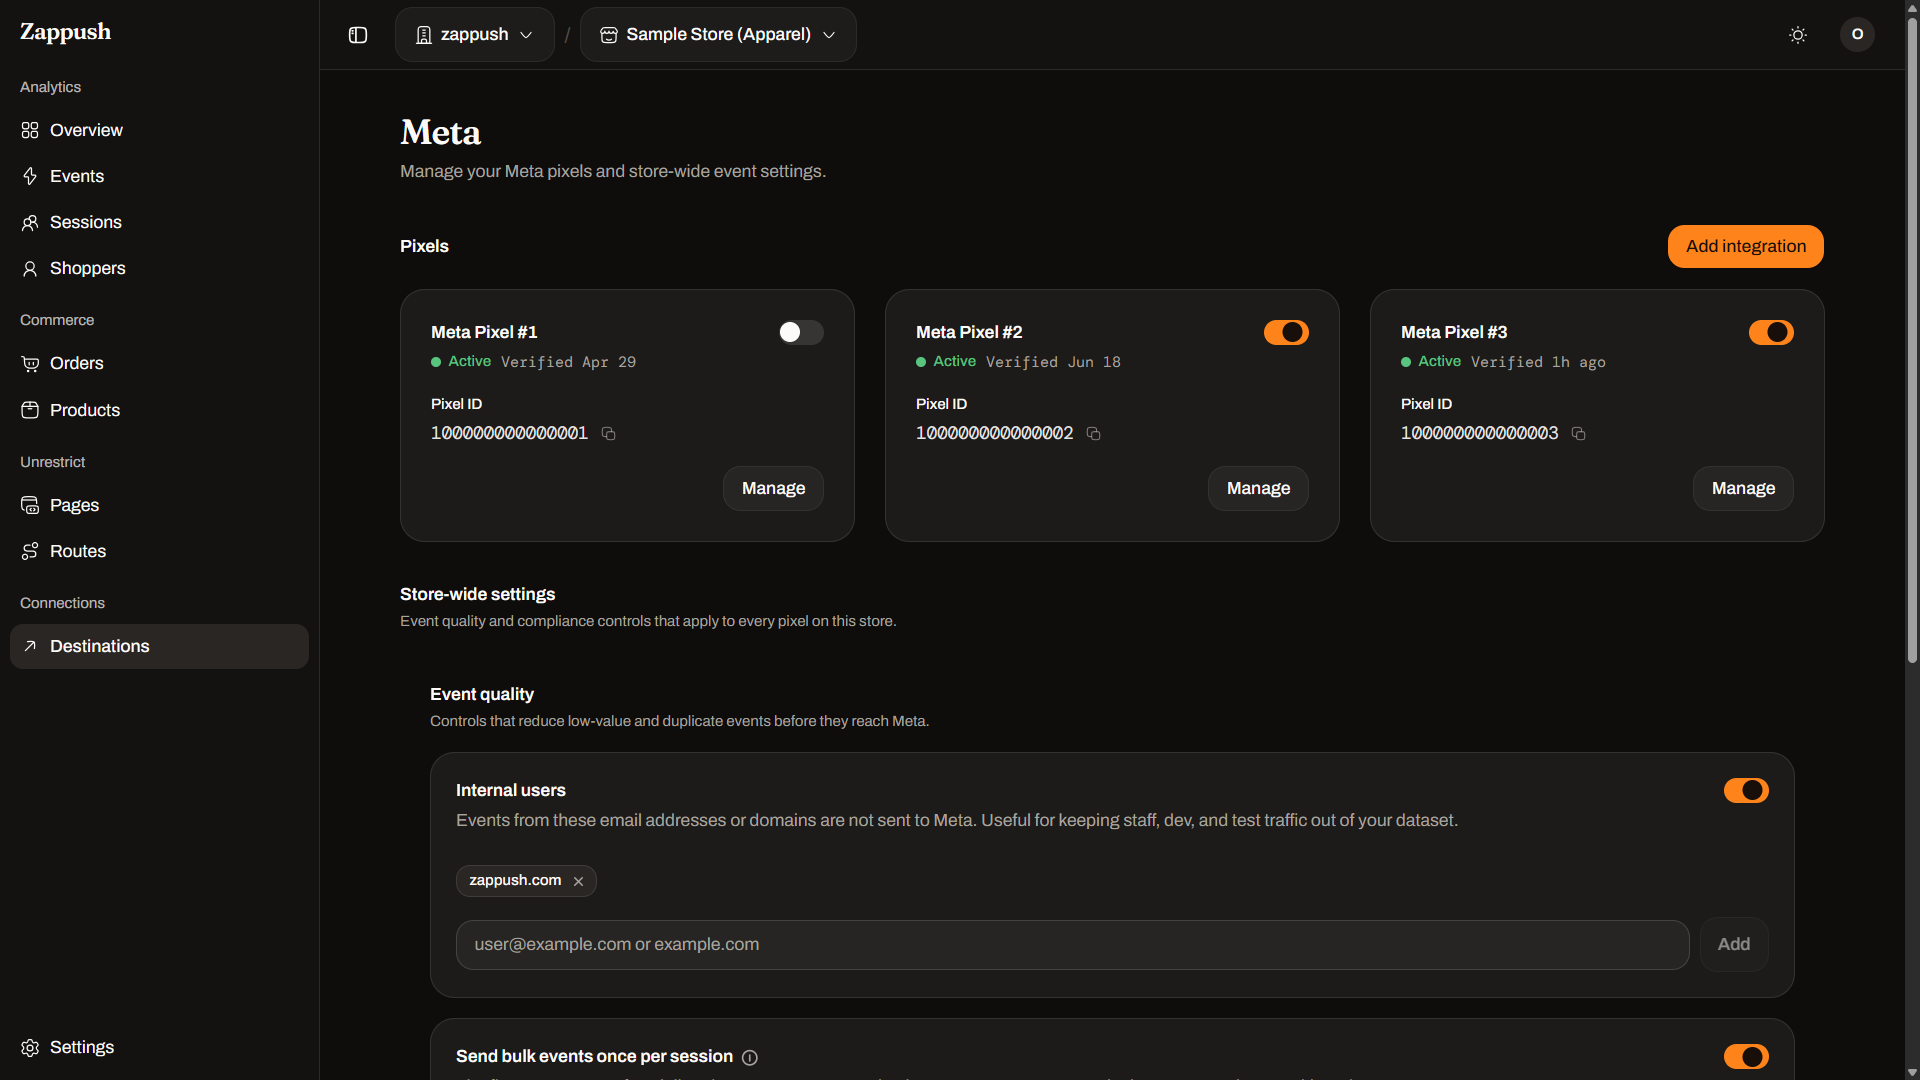
- Save the pixel. It appears in your pixels list under Connections → Destinations → Meta.
- Open the pixel and go to its Test & activity section.
- Send a test event from there. A successful result confirms Meta accepts your pixel's credentials.
- Choose Turn on forwarding when Zappush asks. Your conversions start flowing to this pixel from then on. If you choose Not now, turn it on later with the Forwarding switch at the top of the pixel's page.
If the test fails, the result shows the exact error from Meta. The usual fixes are: regenerate the access token if it expired, confirm the Pixel ID matches your pixel in Events Manager, and make sure the token has permission for that pixel.
Each pixel's detail page also has a Forwarding section (choose which events to send) and an Aliases section (send an event to Meta under a different name). You do not need either to get started, but they are there when you want to tune delivery.
6. Allowlist your domain in Meta
If you advertise with a compliant page, Meta needs that domain added to your Business Manager and verified before your ads can reliably point to it.
Need a visual walkthrough? Watch Facebook Pixel Allow List on YouTube.
Why Meta needs a verified domain
Meta domain verification is how you claim ownership of a domain in Business Manager. Meta uses it to:
- Prove you control the domain your ads send people to, not just Zappush
- Protect your brand from other advertisers editing how links to your domain appear in their ads (wrong headlines, images, or descriptions)
- Unlock domain controls in Business Manager, including Domain Access rules for who can edit ad links to your domain
Without a Meta-verified domain, ads to your compliant page can be blocked or limited, and conversion data from that domain may not attribute correctly.
Zappush Verified and Meta Verified are different checks:
- Zappush Verified (on Unrestrict → Pages) means your DNS records are live so we can host the page with SSL.
- Meta Verified (in Business Settings → Domains) means Meta has confirmed you own the domain.
You need both. A page can show Zappush Verified while Meta still lists the domain as unverified, and the other way around if DNS is still pending.
Checklist
Work through these in order:
- Zappush DNS verified — your compliant page loads on its domain (see Set up a compliant page)
- Add the domain in Meta — Business Settings → Brand Safety and Suitability → Domains
- Add Meta's verification code to your page in Zappush (steps below)
- Confirm in page source — search for
facebook-domain-verification - Click Verify in Meta — the domain should show Verified
- Leave the tag in place — Meta may re-check it
- Optional: open Domain Access on the verified domain to control who can edit ad links to it
Add the domain in Meta
- Open Meta Business Settings.
- Go to Brand Safety and Suitability, then Domains.
- Click Add and paste your compliant domain (for example
yourcompliantdomain.com, with nohttps://).
Meta shows the domain as unverified until you complete the next step.
Add Meta's verification code
On the domain in Meta, open the Meta Tag Verification tab. Meta gives you a one-line HTML tag that looks like this:
<meta name="facebook-domain-verification" content="your-unique-code-here" />If Zappush hosts the page, you do not need to edit any HTML. Open the page in
Unrestrict → Pages, find Meta domain verification, and paste what Meta gave
you into Verification code. You can paste either the content value on its own or
the whole <meta> tag; Zappush pulls the code out for you. Save, then deploy the page.

Zappush writes the tag into your page's <head> on every deploy from then on. This
keeps working when you use a Site Editor override, so custom HTML and Meta
verification no longer conflict.
If you host the page yourself, paste the tag from Meta into the <head> of the
page at the URL you gave Zappush when you created it.
Before you click Verify in Meta, open your live domain in a browser, view the page source, and confirm the tag is present. Meta checks the live page, not Zappush's dashboard. It can take a few minutes after you deploy.
Leave the verification code in place after Meta verifies the domain. Meta may check it again later. Clearing the field and redeploying removes the tag, which can flip the domain back to unverified.
Other ways Meta accepts verification
Meta also supports DNS TXT and HTML file upload on the same Domains screen. If you already manage DNS for Zappush hosting, DNS TXT can work at your registrar instead of the meta tag. For pages Zappush hosts, the Verification code field above is the simplest path because it needs no HTML editing and survives every redeploy.
Confirm in Meta
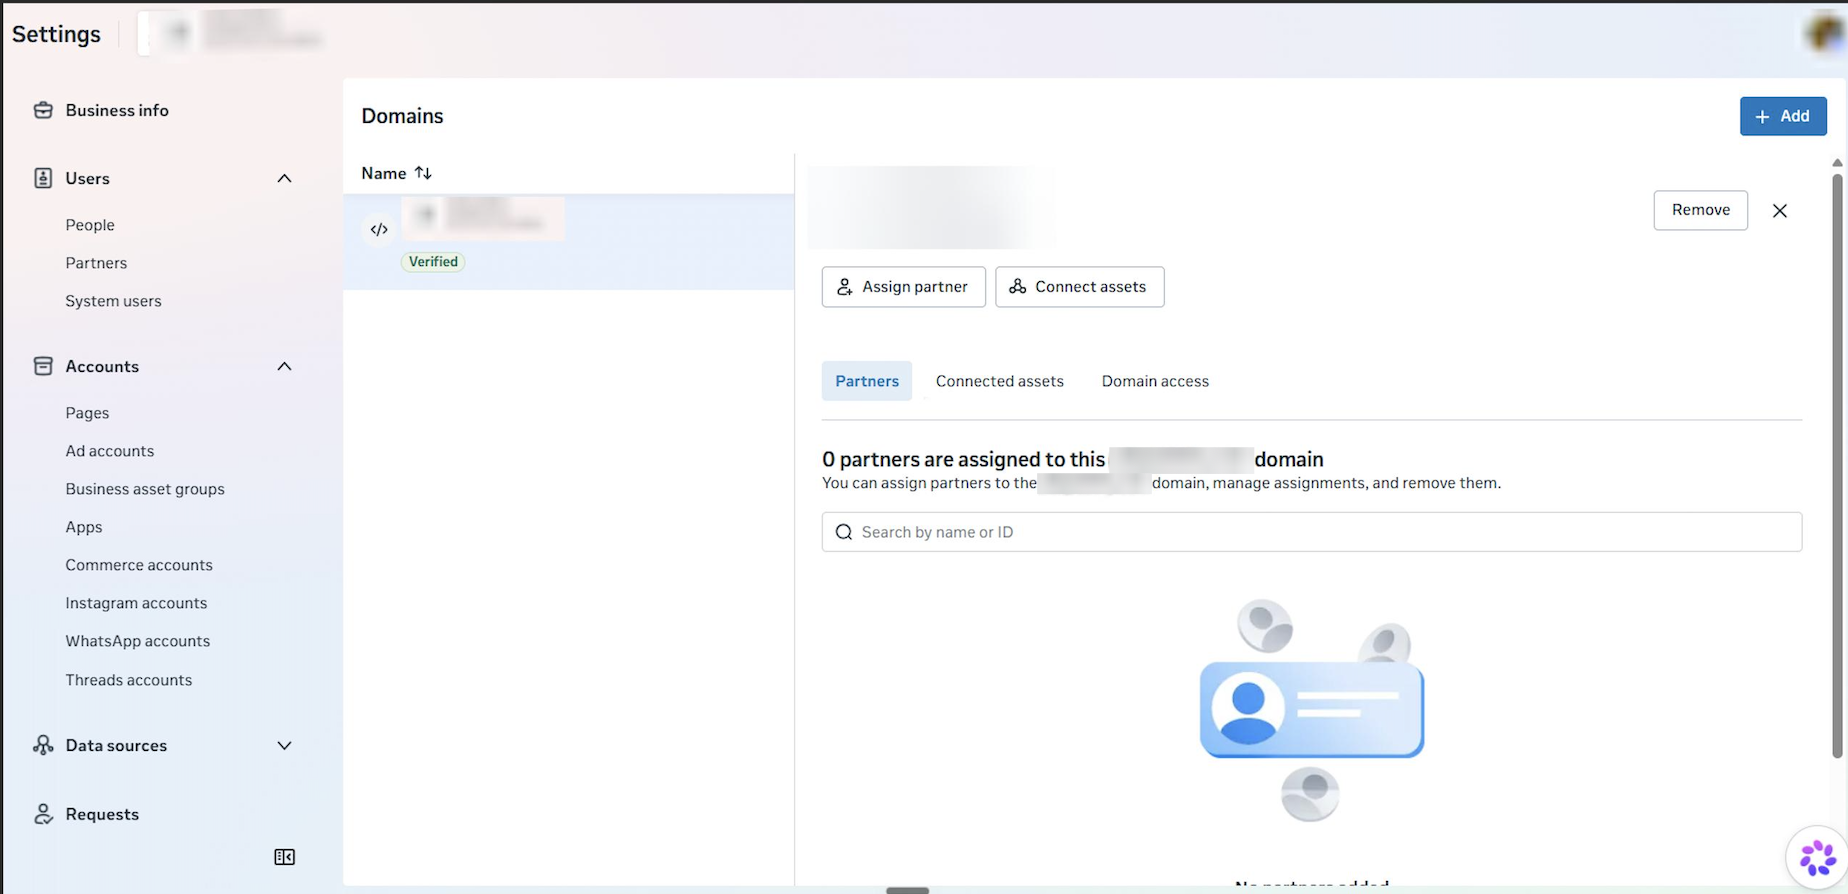
Back in Meta Business Settings → Brand Safety and Suitability → Domains, click Verify on the domain. Once Meta finds the tag, the domain shows as Verified and your ads can point to it.
Control ad link editing (optional)
After verification, open the domain's Domain Access tab in Business Settings. From there you can see which Facebook Pages link ads to your domain and choose who is allowed to edit those ad links. See Meta's guide on ad link editing.
Troubleshooting
- Meta still shows unverified: open your live homepage, view source, and search for
facebook-domain-verification. If it is missing, the tag is not deployed yet. - Code is saved but Meta cannot see it: saving the field is not enough on its own. Deploy the page, then wait a few minutes and try Verify again.
- Zappush rejects the code: the code accepts letters, numbers, hyphens and
underscores only. If you pasted the full tag and it was refused, copy just the
contentvalue. - Zappush shows Verified but Meta does not: DNS and Meta verification are separate. Complete the Meta steps above even when Zappush is already verified.
- Meta shows Verified but Zappush does not: finish the DNS records in Connect your domain on the page editor.
For Meta-side errors, see Meta's domain verification debugging guide.
7. Turn off Meta's automatic page and product details
Meta can add its own details on top of what you send. In Events Manager, the setting Automatically include more detailed page and product info uses AI to read your website and send extra data with your pixel events: basic page info, media, business location and contact information, content classification, authorship, and product identification and attributes.
Turn this off if you advertise a restricted category. A compliant page works because Meta only ever sees the clean page. This setting lets Meta gather product and page details on its own, which can undo that.
- Open Events Manager and select the dataset that matches your Pixel ID.
- Click Settings.
- Under Meta Pixel settings, find Automatically include more detailed page and product info.
- Switch it off.
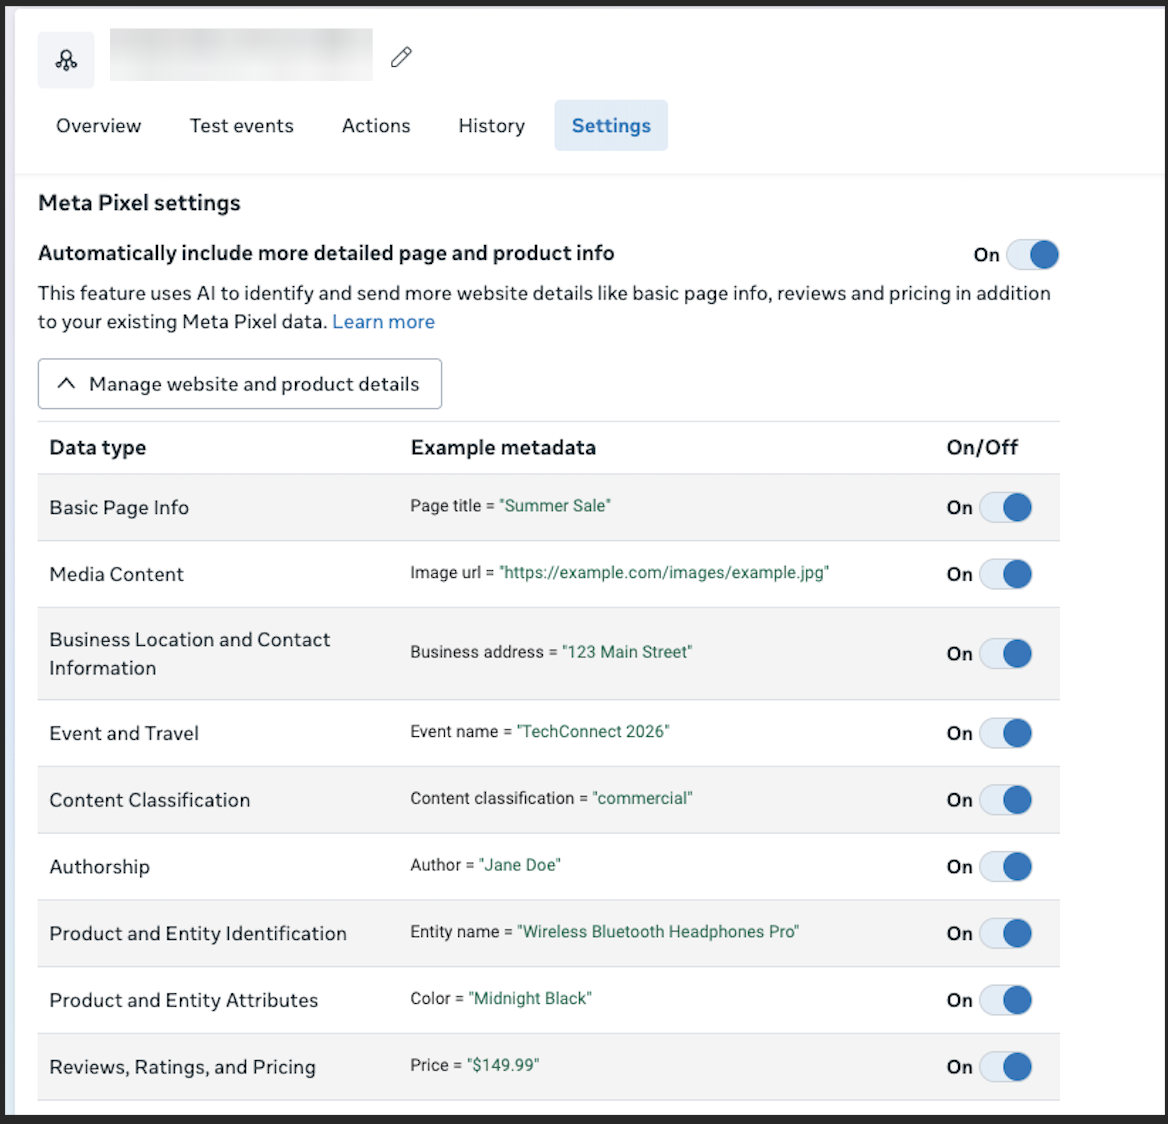
The screenshot shows the setting turned on. You want it off.
To keep the setting on but send less, click Manage website and product details and turn off the data types you do not want.
You'll know it worked when
The pixel shows as Active in your pixels list at Connections → Destinations → Meta.
Next: advertising Health and Wellness? Set up a compliant page. Otherwise, jump to verify delivery.